
Overview
A Mod Level Data (MLD) is a data asset you can include in your pak to customize the following for a level;
- Show in mission Select true/false
- Level Display Name, Nickname and Designation
- Level Picture
- Level Description
- Mission Select Preview Map
- Objectives
- Entry Points
- Briefing Images and Map Image
- Briefing Biographies
- Briefing Timeline
By default, if you don’t include a MLD for your level, the game will create one at run time based on the file name and display it in the levels list.
That auto MLD also includes the default Objectives; BringOrderToChaos and RescueAllCivilians.
Basic MLD Setup
Part 1 - Creation
To create a MLD you can use two methods:
Manual Method
- In the content browser navigate to your level’s content directory and optionally add a ModLevelData folder
- Within your folder, press the
+ Addbutton in the top left, and create aMiscellaneous > Data Asset - In the popup window, search for mod level data and chose the
Mod Level Dataclass, then press Select to create it. - Naming isn’t essential, however, usually you want to use:
MLD_YourLevelFileName
Scripted Asset Action Method
This is the same process as above, but is automated.
- Optionally add a ModLevelData folder to your level directory.
- Select your level/s and right-click it. Press
Scripted Asset Actions -> Create Mod Level Data - For the first/only level selected;
- In the file selector, chose a location in your level directory, like the folder you created in step 1.)
- Don’t change the name.
- For the first/only level selected;
- In the popup window, search for mod level data and chose the
Mod Level Dataclass, then press Select to create it.
- In the popup window, search for mod level data and chose the
- Find your MLD in the chosen folder and save them.
This action will work with multiple levels selected
- Create data asset and set MLD file name automatically
- Set
Level Nameautomatically to level file name +Friendly, Nickname and Designation.- Set default
Objectives
When run with multiple levels selected, the folder path is based on the first level’s popup choice in step 2.)
Part 2 - Configuration
- Open your new Mod Level Data asset
Set the very, very top
Level Namevariable to the file name of your level that is present in the Editor.There are some hard-coded forbidden names you must avoid such as
houseand any vanilla Ready Or Not map names. Example Map MLD “Level Name” set to the level’s file name used in the Editor. NOT the name you want to call it in game.
- If missing entries; find the
Objectivesarray and add+two entries.- Set one to
BringOrderToChaos - Set the second to
RescueAllOfTheCivilians

By default, after creating a custom MLD for your level, these are missing, so your mission will auto complete if you do not add them now.
- Set one to
- Expand
Dataif not already and set values forFriendly Level Name: What you actually call your map- Thank You, Come Again
Level Nickname: Usually the name of the location the map takes place in- 4U Gas Station
Level Designation: Usually the Address of the mission- 4U Gas Station, 5th St, South Los Suenos
Time of Day:: When the mission takes place- 2300
Description: Short description when you select the mission from the mission select- Seizing a moment of opportunity, a posse of delinquent young adults execute their plan in order to support a crippling addition.
- Set the
Level Picture: This is the main image of the map when selecting a level.- Guide here: Level Select Image
- Set the
Mission Select Map: This is the fullscreen background image shown in the Mission Select screen that usually has some minor animation/effect.- Guide here: Mision Select Level
- If you want multiple spawn points set the
Entry Points- Guide here: Entry Points
- If you want custom objectives/reportables, add additional entries to
Objectives- Guide here: Custom Objectives & Reportables
- The MLD also contains information for stuff like Suspect & Civilian Bios, Photos for Evidence, Floor plans (Floor maps) and more. All of theme are pretty self explanatory so just go through and add information as required.
 Example Map MLD “Level Name” set to the level’s file name used in the Editor. NOT the name you want to call it in game.
Part 3 - Cooking
By default when you specify your level to be included in the build (in Packaging Settings) there is no reference chain to your Mod Level Data assets.
Some basic solutions to this are to include the MLD containing folder in the extra directories to be cooked (project settings) or by referencing the MLD in your level blueprint.
The Los Suenos Stories Framework update includes a simple blueprint actor that you can also now use.
- Open your level which is set in the Project Settings to be cooked.
- Go to /Content/Mods/Template/Blueprints/ (or your copy)
- Place a
BP_ModLevelDataReferencerin your level. - Add an entry to
Mod Level Datasand then use the picker to find and add the MLD you created earlier.If you have many MLD that you want to reference, you can select them all in the Content Browser, then drag them onto the
Mod Level Datasproperty to quickly add them all.
That’s it! There’s now a reference chain to your MLD so they will be automatically included in your cook when your map is set to cook.
Level Select Image
Screenshot Capture
We’ll need an image for the MLD and for our mission selector level later. You can either take this in game or in editor.
For in game;
- Use a mod like “Console Unlocker - Camera Mod” to free cam
- Set your resolution to 16x9 if you have a ultra-widescreen.
- Set any upscaling to off or native.
- Set game resolution to >= 100%
- Take your screenshot with steam ( F12 ), Print Screen key, Windows Snipping Tool ( Windows Key + Shift + S ) or even better;
- If you have a console enabled (via UE4SS etc) you can run
highresshot 2- This will output to
...\Ready Or Not\ReadyOrNot\Ready Or Not\Saved\Screenshots\ - The
2means double your resolution so you can downscale the image with much better anti-aliasing.
- This will output to
For in editor;
- Create a camera actor in your level.
- Ensure
Constrain Aspect Ratio=TrueandAspect Ratiois set to1.777778(16/9) - In the top left of your 3D viewport, click the (usually named)
Perspectivedrop menu and select your new camera.

- Enable game view by pressing
Gand fullscreen (F11) - Again in the top left of your 3D viewport, click the hamburger icon

- Click
High Resolution Screenshot... - Set
Screen Shot Multiplierso it will create a 4k+ image based on your current resolution.
- Click
- Pilot your camera into the desired location and click
Capture - Use the pop-up in the bottom right to open your project’s screenshot folder or find it at
.\Saved\Screenshots\WindowsEditor\
Process and Import
- In Photoshop or a free alternative, scale your image to 2048x1048 pixels (or higher). Save as a .png or .tga 24bit.
- File naming is optional but
T_LevelSelect_YourLevelName_UIis a recommended format
- File naming is optional but
- Import your screenshot to your Mods > YourUsername directory, via the content browser.

- How you organize your assets it up to you, just make sure it’s within your mods folder.
- Open your newly imported texture and set:
Texture GrouptoUIMip Gen SettingstoNoMipmaps
- Save your texture.
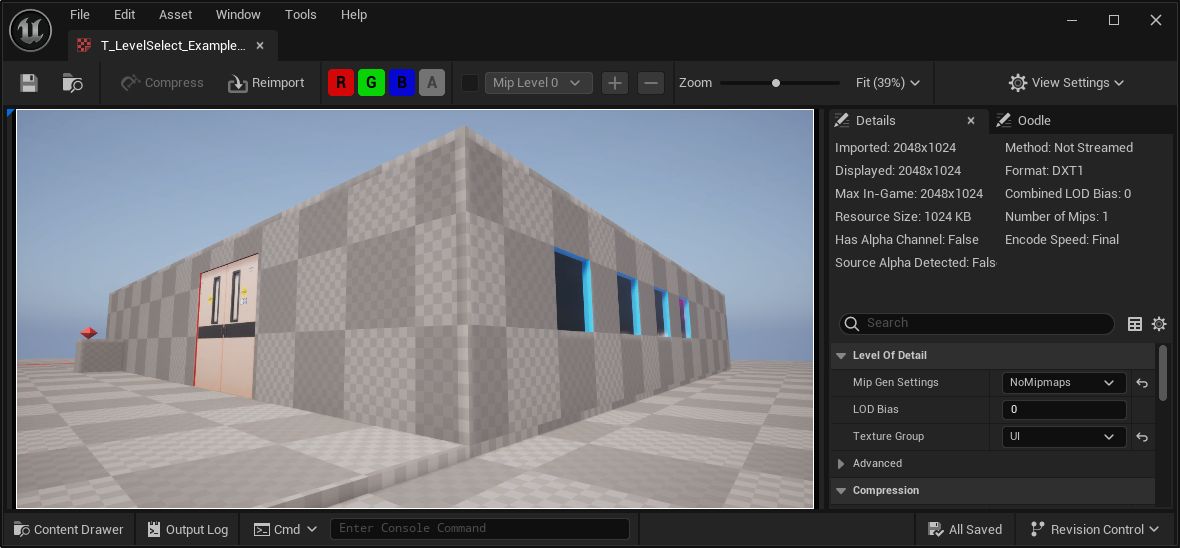 Example Map screenshot texture settings
Mission Select Level
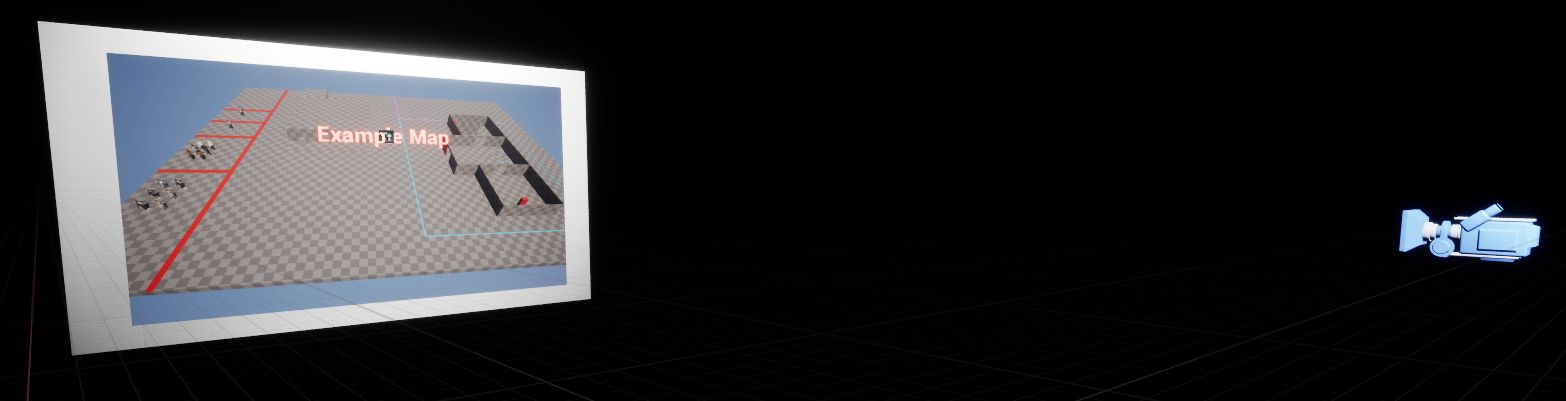
The Mission Select Level is the fullscreen image you see when selecting a mission, official maps usually have some sort of particle effect going on to make it look a little bit dynamic. But as the name suggests, it is not an image but a Level/.umap.
Mission Select Levels are meant to be extremely light-weight so they load quickly.
- Most levels are going to consist of an image plane mesh, assigned an unlit material with a screenshot texture.
- A camera is pointed at it with the actor tag
LosSuenosCameraadded to indicate to the game which camera to view.
Since these are levels you can do some pretty interesting things with them. However do not use a lot of static meshes or effects. All official maps are pretty much just a screenshot with a particle effect so they load quickly. DO NOT just use your main level.
Step 1 - Create the Level
- Open a second content browser if one isn’t open.
- Navigate the first to your level asset directory.
- Navigate the second to
/Content/Mods/YourUsername/Template/Levels/
- Copy the
RoN_ExampleMap_MissionSelectlevel to your folder by dragging it and choosingCopy Herefrom the prompt. - Rename the copied level to
YOURLEVELNAME_MissionSelect- Naming is optional, but this format is recommended.
- Ensure the renamed level is saved, then, right-click your folder and run
Fix Up Redirects
- Open the level.
Step 2 - Editing the Level to show your Screenshot
- Create a new Screenshot, using the steps from earlier to be used as the main texture for the material we are going to use.
- This time it is recommended naming this image along the lines of
T_MissionSelect_YourLevelName_UI
You can use the same image as the Level Select, but all official maps have a different perspective than the Level Select image - usually something that focuses on a point of interest or an overview of the map.
- This time it is recommended naming this image along the lines of
- Open your second content browser if one isn’t open.
- Navigate to where you saved your previous images
- Navigate the other to
/Content/Mods/YourUsername/Template/Levels/UI/
- Select both
M_MissionSelect_TemplateandMI_MissionSelect_ExampleMap - With both selected, drag both to you directory folder where you keep your images
- IMPORTANT: Select
Advanced Copy HerethenOKin the pop-up window.Do not use the regular copy! Otherwise the Material Instance will have it’s parent and reference still set to the original material in the template folder,
which you DO NOT want in order to stop conflicts with other mappers. - Optionally rename both the material and instance with
_YourLevelNameappended (instead of “ExampleMap” or “Template”) * After renaming, right click your Mods > YourUsername folder folder runFix Up Redirects - Open your copy of
M_MissionSelect_Template - Find the
Texture Samplenode to the left and select it.- Assign your new screenshot texture via the details panel on the left.
In the top left of the window press
Applyand save. Close the window. Material texture node assignment
- Open your
_MissionSelectlevel if it’s not open. - Select the
Planestatic mesh actor that has the template’s screenshot material assigned.- From the details window, change the assigned material to your material instance.
- Adjust the level as needed.
- You can view the camera via the top-left menu in the viewport, just be careful not to move it.

- Remove the
TextRenderActorin front of the plane static mesh actor since it will be in the way. - You can customize the view with basic particles or animated materials for water etc.
- You may need to add lights such as a moveable spotlight if you add actors to the scene which you want to see.
- You can view the camera via the top-left menu in the viewport, just be careful not to move it.
- Save your Level
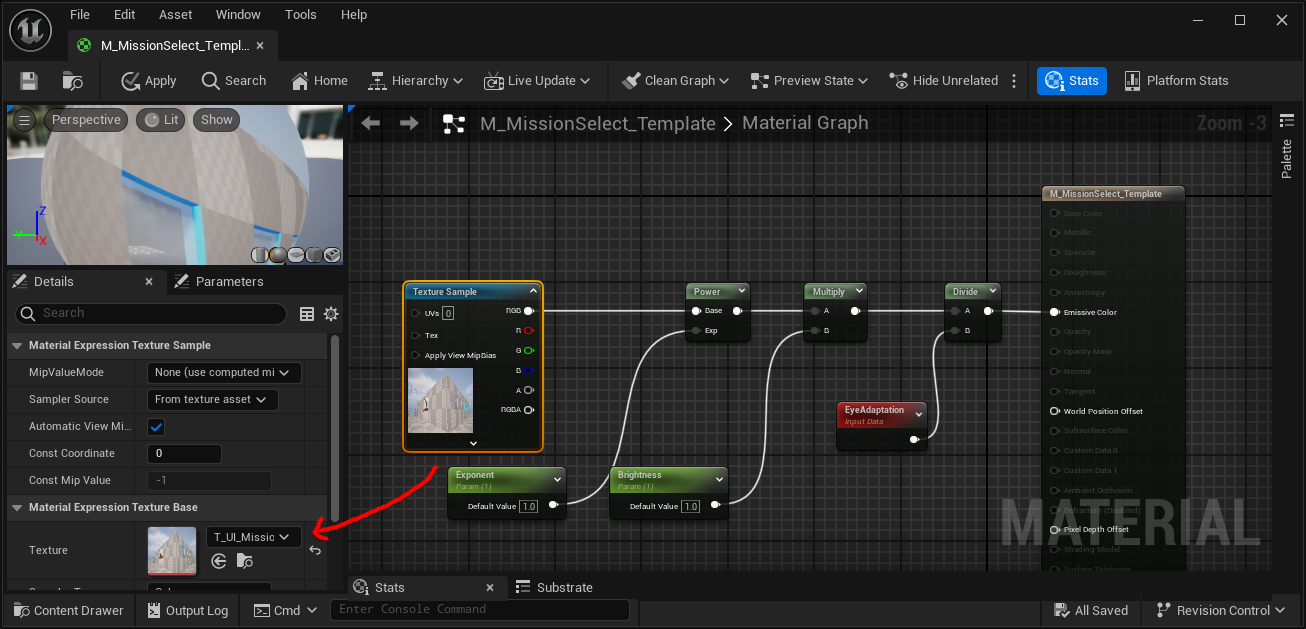 Material texture node assignment
### Step 3 - Hide the Mission Select Level
Now that you have another level, by default, it will be selectable as a playable level in game, which you don’t want. To fix this;
- Create a new
Mod Level Datadata asset for your_MissionSelectlevel using the same methods in #basic-mld-setup.- This MLD does not require any objectives to be set etc.
- Only the
Level NameMUST be set
- In the new
_MissionSelectMLD changeShow in Mission Selecttofalse - Open your actual, playable Level
- In your
BP_ModLevelDataReferenceractor, add an entry and assign your new MLD for the_MissionSelectlevel so that it is included in your cook.
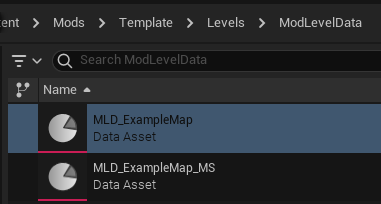 Example Map MLD and the mission select level’s MLD (“MLD_ExampleMap_MS”)
Entry Points
If you want your users to choose from different locations to start the missions, you need to set up Entry & Spawn Points.
There are actually 2 fields required for this. Entry Points seem to be the main way to change spawn location.
- In your level, select your Player Start actor and give
Player Start Taga unique tag- These can be anything, but something simple to match the location used in the MLD is recommended
- Example: spawn_1, spawn_2, spawn_3, etc
- Repeat for all other Player Spawn locations. Make sure the tags for each location are unique.
- Within the MLD, under Data add an array element for
Entry Points- Each element has information for a spawn
- Within the entry, assign the
Tagto match the correspondingPlayer Start Tagfrom above - You can also set other important details:
Name: The name you wish to give the spawn locationDescription: Small sentence to describe the spawn.Image: UI Texture to display the location.Loading Scene: Which loading scene to play (Bearcat, Boat or Helicopter - if left blank Bearcat will be default)- The following levels are valid:
LoadingScene_Bearcat,LoadingScene_Boat,LoadingScene_helicopter
- The following levels are valid:
- Repeat for the remaining Entry Points you have.
If you find your player falls through the ground when you load in the game make sure that your player spawn is high enough off the ground and the ground has collision.
If both of these are true you may need to also set the Spawn entries.
- Within the MLD, under Data there are 4 entries for
Spawn 1,Spawn 2,Spawn 3&Spawn 4. - Within a Spawn entry, assign the
Spawn Labelto match the correspondingPlayer Start Tagfrom above - You can also set other important details:
Spawn Point Name: The name you wish to give the spawn locationSpawn Image: UI Texture to display the location.Spawn Description: Small sentence to describe the spawn.
- Repeat for the remaining Spawns you have.
Custom Objectives & Reportables
TBD
Using Vanilla Levels for Reference
Ready or Not’s vanilla levels now use a similar data asset class to fulfill the same purpose that the MLD does for modded levels.
If there’s something you want to know that the guide doesn’t cover, you can often check out how it’s done in vanilla levels. However with UE5 you can no longer even open the read-only cooked game assets.
Instead you can use the EUW_Tool_ObjectViewer widget located in /Content/Mods/Tools/
With this you can drag in any cooked game asset that doesn’t crash when loaded (and isn’t a data TABLE), and see what properties have been configured in a GUI format.
Although it will let you edit values, they will not be saved/saveable and often crash your editor so don’t do that ;)
Briefing Audio
Because the briefing audios are hard-coded to FMOD events there’s no direct way to customize this for your level. There is the old /Content/Mods/Template/Blueprints/Audio/BP_BriefingAudioSpawner which uses the Mod Sound event and FMOD programmer sounds to hackily play audio somewhat unreliably.
Guide/Rework of that TBD